2.1. Introduction to Arrays#
An array in Julia is an ordered collection of elements. These elements can be of any type, though arrays of numbers (like integers or floating-point numbers) are very common for representing vectors, matrices, and tensors. The individual values in an array are called its elements.
Julia’s array implementation is highly optimized and serves as a fundamental data structure for scientific and technical computing. Unlike some other languages, Julia does not require a “vectorized” style for performance; its compiler generates highly efficient code even for standard scalar indexing loops.
2.1.1. Creating 1-D Arrays (Vectors)#
The simplest way to create a 1D array (or a vector) is to enclose a comma-separated list of its elements in square brackets []:
x = [1, 2, 4, -3]
4-element Vector{Int64}:
  1
  2
  4
 -3
typeof(x)
Vector{Int64} (alias for Array{Int64, 1})
The output shows that x has the type Vector{Int64}. As typeof reveals, Vector is a convenient alias for a 1-dimensional Array. Julia automatically inferred that the elements are integers and used the default type, Int64.
# If the elements are mixed numeric types, Julia promotes them to a common type.
y = [1.1, π, -4/3, 1e-1]
4-element Vector{Float64}:
  1.1
  3.141592653589793
 -1.3333333333333333
  0.1
Here, y is also a vector, but since its elements include floating-point numbers, Julia promotes all elements to the default floating-point type, Float64.
You can also explicitly specify the element type when creating an array:
# Create a vector of Float64s from a list of integers.
z = Float64[1, 2, 4, -3]
4-element Vector{Float64}:
  1.0
  2.0
  4.0
 -3.0
2.1.1.1. Creating Arrays with Functions#
Arrays can also be created using built-in functions. The most common ones are:
Function |
Description |
|---|---|
|
Creates a vector of length |
|
Creates a vector of length |
|
Creates a boolean vector of length |
|
Creates a boolean vector of length |
|
Creates a vector of length |
For zeros and ones, the type T is optional and defaults to Float64.
Note: The
fillfunction is very general and can reproduce the behavior of the others. For example,zeros(Int32, 5)is equivalent tofill(Int32(0), 5), andtrues(3)is the same asfill(true, 3).
2.1.1.2. Adding Elements to an Array#
You can also add new elements to an array (changing the size). For example, push! adds a new element to the end of an array.
push!(z, 10)
5-element Vector{Float64}:
  1.0
  2.0
  4.0
 -3.0
 10.0
Convention: The exclamation mark
!at the end of a function’s name indicates that the function modifies one or more of its arguments. Here,push!modifies the arrayz.
Similarly, the append! function adds the elements from a second array to the end of the first:
append!(z, y)
9-element Vector{Float64}:
  1.0
  2.0
  4.0
 -3.0
 10.0
  1.1
  3.141592653589793
 -1.3333333333333333
  0.1
2.1.2. Accessing and Modifying Elements#
You can access an element in an array using its index inside square brackets []. A key feature of Julia is that its arrays are 1-indexed, meaning the first element is at index 1.
# Access the 3rd element in the array y.
y[3]
-1.3333333333333333
The keyword end can be used as a convenient shorthand for the last index of an array.
# Access the last and second-to-last elements of z.
println("Last element: ", z[end])
println("Second-to-last element: ", z[end-1])
Last element: 0.1
Second-to-last element: -1.3333333333333333
Arrays are mutable, so you can also use indexing to modify elements. Simply assign a new value to an indexed position.
# Set the 1st element of z to the product of the last two elements.
z[1] = z[end] * z[end-1]

# Display the modified array.
z
9-element Vector{Float64}:
 -0.13333333333333333
  2.0
  4.0
 -3.0
 10.0
  1.1
  3.141592653589793
 -1.3333333333333333
  0.1
2.1.3. Traversing an Array#
A common and essential operation is to traverse an array, meaning to access each of its elements in sequence. A for-loop is the perfect tool for this, and Julia offers a couple of convenient ways to write one.
2.1.3.1. Looping by Index#
If you need both the index and the value of each element, you can loop from 1 to the length of the array.
for i in 1:length(x)
    println("Element at index ", i, " has the value ", x[i])
end
Element at index 1 has the value 1
Element at index 2 has the value 2
Element at index 3 has the value 4
Element at index 4 has the value -3
2.1.3.2. Looping Over Elements Directly#
If you only need the value of each element, you can use the in keyword for a more direct and often more readable syntax. The loop variable will be assigned each element of the array in order.
for element in x
    println("The next element's value is ", element)
end
The next element's value is 1
The next element's value is 2
The next element's value is 4
The next element's value is -3
2.1.4. Example: The Sieve of Eratosthenes#
Arrays are perfect for implementing classic algorithms. The Sieve of Eratosthenes is an ancient and efficient method for finding all prime numbers up to a given limit, \(n\). According to Wikipedia, the algorithm is as follows:
Create a list of consecutive integers from \(2\) through \(n\): \((2, 3, 4, ..., n)\).
Initially, let \(p\) equal \(2\), the smallest prime number.
Enumerate the multiples of \(p\) by counting in increments of \(p\) from \(2p\) to \(n\), and mark them in the list (these will be \(2p\), \(3p\), \(4p\), …; the \(p\) itself should not be marked).
Find the first number greater than \(p\) in the list that is not marked. If there was no such number, stop. Otherwise, let \(p\) now equal this new number (which is the next prime), and repeat from step 3.
When the algorithm terminates, the numbers remaining not marked in the list are all the primes below \(n\).
A key refinement is that in step 3, we only need to start marking multiples from \(p^2\). Any smaller multiple, like \(2p\), would have already been marked when we processed the smaller prime factor (in this case, 2). This also means we can stop the main loop (step 4) when \(p^2\) exceeds \(n\).
Wikipedia also provides an animation to illustrate the method:
Our implementation will use a boolean array where is_prime[k] keeps track of whether the number k is considered prime. To determine the upper bound for our main loop (\(p^2 \le n\)), we can use the isqrt(n) function, which efficiently calculates the integer part of \(\sqrt{n}\).
function SieveOfEratosthenes(n)
    # Create a boolean array, initially assuming all numbers are prime.
    is_prime = trues(n)
    is_prime[1] = false # 1 is not a prime number.

    # Iterate from p=2 up to sqrt(n).
    for p in 2:isqrt(n)
        # If p is still marked as prime...
        if is_prime[p]
            # ...then mark all of its multiples (starting from p^2) as not prime.
            for i in p^2:p:n
                is_prime[i] = false
            end
        end
    end

    # Collect all numbers that are still marked as prime.
    primes = Int64[]
    for i in 2:n
        if is_prime[i]
            push!(primes, i)
        end
    end

    return primes
end
SieveOfEratosthenes (generic function with 1 method)
# Find all prime numbers up to 100.
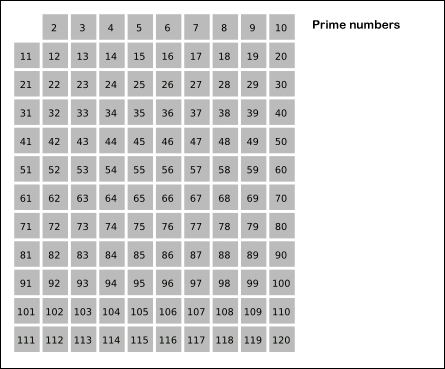
SieveOfEratosthenes(100)
25-element Vector{Int64}:
  2
  3
  5
  7
 11
 13
 17
 19
 23
 29
 31
 37
 41
 43
 47
 53
 59
 61
 67
 71
 73
 79
 83
 89
 97
# Find the largest prime number less than 1,000,000.
SieveOfEratosthenes(1000000)[end]
999983
2.1.5. Element-wise Operations (Dot Syntax)#
A powerful feature in Julia is the dot syntax for vectorization. By placing a dot . before an operator or after a function name, you can apply that operation to every element of an array. This is often called broadcasting.
This avoids writing explicit loops and results in code that is more concise, readable, and often much faster.
x = [1, 3, 5]
y = [0.2, 4.0 , 3.1]

# Element-wise multiplication: computes [1*0.2, 3*4.0, 5*3.1]
z = x .* y
3-element Vector{Float64}:
  0.2
 12.0
 15.5
# Apply the sqrt function to each element of x.
sqrt.(x)
3-element Vector{Float64}:
 1.0
 1.7320508075688772
 2.23606797749979
The dot syntax can be combined to form complex element-wise expressions:
# For each element i, this computes x[i] + sqrt(y[i] ^ x[i])
w = x .+ sqrt.(y .^ x)
3-element Vector{Float64}:
  1.4472135954999579
 11.0
 21.920151004054308
For expressions with many operations, Julia provides the @. macro as a convenient shorthand. It automatically adds a dot to every operator and function call in the expression.
# The @. macro makes the previous expression cleaner.
@. x + sqrt(y^x)
3-element Vector{Float64}:
  1.4472135954999579
 11.0
 21.920151004054308
2.1.5.1. Broadcasting Rules#
For element-wise operations between two arrays, their dimensions must be compatible. For 1D arrays, this generally means they must have the same length.
a = [1, 2, 3]
b = [4, 5, 6, 7] # b has a different length than a

# This will cause a DimensionMismatch error.
a .+ b
DimensionMismatch: arrays could not be broadcast to a common size: a has axes Base.OneTo(3) and b has axes Base.OneTo(4)

Stacktrace:
 [1] _bcs1
   @ ./broadcast.jl:528 [inlined]
 [2] _bcs
   @ ./broadcast.jl:522 [inlined]
 [3] broadcast_shape
   @ ./broadcast.jl:516 [inlined]
 [4] combine_axes
   @ ./broadcast.jl:497 [inlined]
 [5] instantiate
   @ ./broadcast.jl:307 [inlined]
 [6] materialize(bc::Base.Broadcast.Broadcasted{Base.Broadcast.DefaultArrayStyle{1}, Nothing, typeof(+), Tuple{Vector{Int64}, Vector{Int64}}})
   @ Base.Broadcast ./broadcast.jl:872
 [7] top-level scope
   @ In[19]:5
An important exception is when one of the arguments is a scalar (a single number). In this case, the scalar is automatically “broadcast” across all the elements of the array.
# Subtracts 3 from every element of x.
x .- 3
3-element Vector{Int64}:
 -2
  0
  2
Finally, the dot syntax works automatically for any function you define, with no extra effort required.
function pick_largest(a, b)
    if a > b
        return a
    else
        return b
    end
end
pick_largest (generic function with 1 method)
# Compare z and w element-by-element and pick the larger value from each pair.
pick_largest.(z, w)
3-element Vector{Float64}:
  1.4472135954999579
 12.0
 21.920151004054308
2.1.6. Array Slicing#
Slicing is the process of extracting a subset of an array. You can create a slice using a range of indices (like 1:3) or by providing a vector of the specific integer indices you want to extract.
y = [0.2, 4.0, 3.1, 7.0]

# A range `start:stop` extracts all elements from `start` to `stop`.
println("First 3 elements:    ", y[1:3])

# A range `start:step:stop` includes a step size.
println("Odd-indexed elements:  ", y[1:2:end])

# A negative step reverses the order.
println("Elements 2 to end, reversed: ", y[end:-1:2])

# A single colon `:` is a shorthand to select all elements.
println("A copy of all elements:      ", y[:])

# You can also index with a vector of integers.
println("A custom selection:    ", y[[4,2,4,3,3]])
First 3 elements:    [0.2, 4.0, 3.1]
Odd-indexed elements:  [0.2, 3.1]
Elements 2 to end, reversed: [7.0, 3.1, 4.0]
A copy of all elements:      [0.2, 4.0, 3.1, 7.0]
A custom selection:    [7.0, 4.0, 7.0, 3.1, 3.1]
2.1.6.1. Creating Arrays from Ranges#
As you’ve seen, the start:stop syntax creates a Range object, which is a very memory-efficient way to represent a sequence of numbers. While you can often use a Range just like an array, you can explicitly convert it into a regular array using the collect function if needed.
# `1:3` is a Range object.
typeof(1:3)
UnitRange{Int64}
# `collect` turns the Range into a Vector.
x1 = collect(1:3)
println(typeof(x1))
Vector{Int64}
# This works for any kind of range.
x2 = collect(10:-2.5:-3)
6-element Vector{Float64}:
 10.0
  7.5
  5.0
  2.5
  0.0
 -2.5